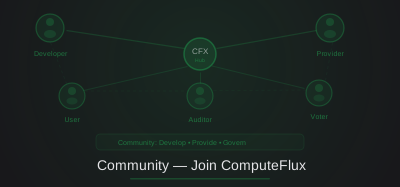
In one sentence. You can join ComputeFlux as a developer, as someone renting out an idle GPU, or as a user — and the third path takes about five minutes.
Picture it like this. The farmers' market from Article 6, seen from the other side of the stall. You can grow, you can sell, or you can shop. Most people who stick around end up doing at least two.
Why it matters. The strongest argument in this article isn't a call to action, it's a technical one: a TEE system whose source is closed cannot deliver its central promise. If nobody can read the code, "the enclave is running the code we claim" is just a claim. The community isn't a nice-to-have here — it's the auditor.
Just want to run a GPU and get paid? Skip to provider onboarding.
The Three-Party Ecosystem
ComputeFlux is not a product you consume; it's a network you participate in. The architecture creates three distinct participation paths, each with its own onboarding journey, technical prerequisites, and value proposition. A developer contributes code and shapes the protocol's evolution. A provider contributes compute resources and earns revenue. A user contributes demand and, through governance, helps steer the network's direction. These roles are not mutually exclusive — the developer who builds a feature may also run a provider node and use the API for their own applications — but each requires a different mental model of how to engage with the system. This guide maps all three paths, from first commit to first inference, and closes out the series you've just read.
Article 24: i18n & SEO for the dApp covered how ComputeFlux reaches a global audience through translation, prerendering, and search discoverability. This article is the natural next step after "finding" ComputeFlux: what happens once you're actually here and want to do something with it — write code, run a provider, or just make your first API call.
Developer Onboarding: Understanding the Repo Before Writing Code
The Repository Structure as Architecture Documentation
The node repository is organized as a Go monorepo; the DApp frontend is deployed as a separate project that simply points its API base URL at a node, rather than living inside this repo. One naming wrinkle to get out of the way first, because it will otherwise trip you up on your first import: the repository checks out as tee-node, while its Go module path is github.com/computeflux/tee-provider. Both names are correct — you clone tee-node and you import tee-provider. Understanding the directory structure is the first step to understanding the architecture:
tee-node/                            # module: github.com/computeflux/tee-provider
├── main.go                          # Application entry point
├── Dockerfile                       # EGo SGX container build
├── go.mod / go.sum                  # Go dependencies (EGo, CometBFT, Pebble, etc.)
├── tee-chain/                       # The CometBFT ABCI application
│   ├── consensus.go                 # Vote Extensions, Prepare/Process Proposal
│   ├── tx_to_realy.go              # Cross-chain settlement relay
│   ├── tx_finalize.go              # ABCI FinalizeBlock implementation
│   ├── epoch.go                     # Epoch lifecycle management
│   └── runtime/
│       ├── module/gateway/          # On-chain gateway contract
│       │   ├── types.go            # All data structures (ModelInfo, Provider, etc.)
│       │   ├── reputation.go       # Report/Audit logic, EMA scoring
│       │   ├── gateway.go          # IndexedList storage declarations
│       │   └── codec_gen.go        # Auto-generated SCALE codec
│       └── wasm/                    # wazero WASM runtime
├── pkg/
│   ├── api/gateway/                 # REST API layer
│   │   ├── relay_handler.go        # Route registration
│   │   └── protocol/               # OpenAI/Anthropic/Gemini translation
│   ├── services/
│   │   ├── scheduler/              # Request distribution, retry, backoff
│   │   └── local_tunnel/           # Yamux reverse tunnel for Edge Route
│   └── dkg/                        # Distributed Key Generation (kyber)
└── graph/                           # GraphQL layer (gqlgen)
    ├── *.graphqls                  # GraphQL schema, split by domain (auth, chain, contract, edge, secret, early_access)
    ├── mod.go                      # Server initialization
    ├── auth.go                     # Authentication middleware
    └── *.resolvers.go             # Query/Mutation/Subscription resolvers
The structure separates concerns cleanly. tee-chain/ is the consensus-critical path — everything that executes deterministically in the TEE. pkg/ is the service layer: API handling, scheduling, networking. graph/ is the management API the DApp talks to from its own repo.
The line between tee-chain/ and pkg/ is the trust boundary. Code in tee-chain/ runs inside the SGX enclave and must be deterministic and side-channel-resistant. Code in pkg/ runs on the untrusted host and can use anything Go offers, including non-deterministic operations like random number generation and filesystem access.
If that boundary sounds familiar, it should. It's the same one Article 1 introduced when explaining why ComputeFlux runs inside hardware enclaves at all.
The Build System: EGo's Unique Constraints
Building ComputeFlux is not go build. It's ego-go build, which invokes the EGo toolchain to produce an SGX enclave binary. This has implications that affect every developer:
CGO is forbidden. The EGo compiler replaces Go's standard CGO-based mechanisms with enclave-compatible alternatives. Any dependency that requires CGO (including the original bytedance/sonic JSON library) must be replaced with a pure-Go alternative. The go.mod file contains an explicit replace directive for sonic, pointing to a stripped-down version in pkg/util/sonic/ that delegates to encoding/json. Before adding any new dependency, verify that it compiles with CGO_ENABLED=0.
The filesystem is virtualized. PebbleDB writes to a path within the enclave's virtual filesystem, which is backed by encrypted pages in the SGX EPC. The token_chain_data/ directory is not a real directory on the host filesystem — it's an abstraction provided by EGo's trusted filesystem layer. Direct filesystem operations (like os.ReadFile on arbitrary paths) work but access the virtual filesystem, not the host's.
Networking goes through OCALLs. When the enclave makes a network request (e.g., to an upstream AI provider), it issues an OCALL (Out-Call) that transitions from the encrypted enclave to the untrusted host OS, which performs the actual socket I/O. This means that network I/O is a potential side channel — the host can observe the timing and size of network requests, even though it cannot read their contents. For non-adversarial deployments, this is acceptable; for high-security deployments, network traffic should be padded or tunneled through a VPN.
Local Development: The 3-Node Network
The fastest way to validate a change is the local 3-node network described in Article 21: Deployment Architecture — three instances of the same binary, each with its own port assignment, no container orchestration required. Each node runs in SGX simulation mode (OE_SIMULATION=1), which removes the hardware requirement while preserving the multi-node consensus behavior. The development workflow is:
- Make code changes in
tee-chain/orpkg/. - Run
go test ./...to validate unit tests. - Start the 3-node network: three terminals, each running
go run main.gowith different port assignments. - Send a test request:
curl -X POST http://localhost:61000/v1/chat/completions -H "Authorization: Bearer sk-test-..." -H "Content-Type: application/json" -d '{"model": "gpt-3.5-turbo", "messages": [{"role": "user", "content": "Hello"}]}'. - Observe the request flow through the scheduler logs, the consensus logs, and the relay logs.
The MOCK_EMAIL=true environment variable prints OTP codes to the console instead of sending emails. For testing the Web3Auth login flow (which requires a real email for OAuth), use a test Gmail account with application-specific passwords.
Testing Requirements and the PR Process
ComputeFlux's testing culture emphasizes behavioral testing over coverage metrics. The most valuable tests are:
- Contract state transition tests (
tee-chain/runtime/module/gateway/*_test.go): Verify thatRegisterModelfollowed byReportModelfollowed byResolveReportproduces the expected reputation score. These tests exercise the full contract lifecycle described back in Article 18. - Scheduler integration tests (
pkg/services/scheduler/*_test.go): Mock upstream providers with predetermined responses and verify that the scheduler correctly handles rate limits, dead endpoints, and protocol translation. - Protocol conversion tests (
pkg/api/gateway/protocol/path_test.go): Verify that every valid path conversion produces the expected upstream path, and every invalid conversion returns the expected error. - Auth flow tests (
graph/auth_test.go): Verify that unauthenticated requests are rejected, authenticated requests include the correct user context, and inactive API keys are denied.
Every PR needs four things: a linked issue describing the problem or feature, a descriptively named branch (feat/epoch-automation, fix/rate-limit-deadlock), passing CI in each repo (the node repo runs go test ./..., the separate DApp repo runs npm run build) — and at least one approving review from a maintainer.
Breaking changes to the gateway contract's state schema need one more thing: a migration plan. The WASM upgrade system handles code changes. Data migrations, like adding a field to ModelInfo, need explicit on-chain migration logic.
Provider Onboarding: From GPU to Gateway
Becoming a provider means registering on-chain, configuring model access, and establishing a revenue stream. There are two provider models:
Data Center Provider (API Key Aggregation)
If you have API keys to OpenAI, Anthropic, or Gemini, you can register as a provider and earn revenue by routing requests through your keys. The steps:
1. Register your provider identity via GraphQL mutation. Specify your region (bitmask for geographic coverage), your provider type (OpenAI-compatible, Anthropic-compatible, Gemini-compatible), and a deposit — staked tokens that the on-chain data model designates as forfeitable for misbehavior, whether or not that forfeiture is fully automated in the current implementation.
2. Register each model you want to serve. Each registration specifies the model name as the upstream provider recognizes it (gpt-4-turbo, say), input and output pricing per token in the network's native token or a stablecoin, the context length, the supported modalities across text, image, and audio, the maximum concurrency you can handle, and — critically — the API key or keys for the upstream provider.
3. API key protection. Your upstream keys live in the gateway contract's on-chain state, which sits in TEE-sealed storage (Article 2). They're unreadable outside a correctly attested enclave, and masked before any query response returns them — so after submission, no external caller ever sees the full key again, including the DApp you registered from.
That's a strictly weaker guarantee than the DKG threshold-decryption custody ComputeFlux applies to user secrets (see Article 3, and the custody discussion in Article 23). Extending that cooperative-decryption model to provider keys is a natural direction for the design to grow. If a key is compromised, rotate it: register a new one and revoke the old on-chain.
4. Monitor reputation. Your models accrue an EMA-based reputation score driven by system audits and community reports (see Article 18), and your provider account separately accrues a success-rate/latency track record from automated call reporting. A high score is meant to translate into more scheduling priority and more revenue. A low one signals quality problems. And per the design intent of the deposit field, sustained misbehavior is meant to put that deposit at risk — though the full automation of that penalty is still maturing.
The economic calculus: your revenue is (your_price - upstream_cost) × request_volume. Your cost is the deposit (opportunity cost of locked capital) and the reputational and financial risk of providing degraded service. As long as your_price > upstream_cost and your reputation is high enough to attract request volume, providing is profitable.
Edge Route Provider (Personal GPU)
If you have a local GPU running an inference server (llama.cpp, vLLM, Ollama, etc.), you can connect it to ComputeFlux via the Yamux tunnel and earn revenue from requests routed to your model. This is true decentralized compute — you're not reselling API access; you're providing the actual inference compute.
The steps:
1. Run your inference server locally on http://localhost:8080/v1 (or any port). It must expose an OpenAI-compatible API (most inference servers do by default).
2. Start the tunnel client. The tunnel establishes a persistent connection (WebSocket over TLS to port 19000, with Yamux multiplexing streams inside) to the ComputeFlux network's tunnel server. It authenticates with your provider's API key, registers your model(s) via FrameTypeModelRegister control frames, and listens for incoming inference requests.
3. Yamux multiplexing. A single TCP connection can carry multiple concurrent inference streams. Each stream is an independent request/response pair. The tunnel server handles flow control and backpressure: if your GPU is saturated, the server stops routing new requests to you until existing streams complete.
4. NAT traversal. The tunnel client initiates the connection to the tunnel server, so your local GPU does not need a public IP address or port forwarding. The Yamux connection is outbound-only from the client's perspective, which works through NAT, firewalls, and CGNAT.
The economic model for Edge Route providers is different from data center providers: you earn revenue proportional to the compute you provide (token counts processed), not the spread between your price and an upstream API cost. Your GPU is a capital asset that generates yield — the economics are similar to cryptocurrency mining, but the work is AI inference rather than hash computation.
User Onboarding: From Curiosity to First API Call
Using ComputeFlux as an end user requires: creating an account, obtaining an API key, funding your account, and making API calls through the OpenAI or Anthropic SDK.
Account Creation and API Key Management
Step 1: Authenticate. ComputeFlux uses Web3Auth for social login. You can sign in with Google, GitHub, Twitter, or email. Web3Auth generates an MPC-TSS wallet for you — your private key is split into multiple shares, with one share held by Web3Auth's auth network and another on your device. This means you don't need to manage seed phrases or browser extensions.
Step 2: Create an API key. Through the DApp's API Keys page, generate an API key. The key is shown once at creation time — store it securely. The key's blake2b hash is stored on-chain; the plaintext key is never stored anywhere after creation. If you lose the key, you must create a new one and deactivate the old one.
Step 3: Fund your account. Transfer tokens to your account through the DApp's Billing page. The balance is held on-chain in the gateway contract. Each API call deducts tokens based on the model's pricing and the actual token counts consumed.
Step 4: Make API calls. Use the standard OpenAI SDK or Anthropic SDK, replacing the base_url with the ComputeFlux gateway URL and the API key with your ComputeFlux API key. No code changes required beyond these two configuration values. All existing tools, frameworks, and libraries that work with the OpenAI SDK will work with ComputeFlux.
Understanding Your Bill
Every API call produces a Settlement record on-chain. This record is your cryptographic receipt: it proves that you were charged for exactly the tokens you consumed, at exactly the price displayed when you selected the model. You can audit your billing history through the DApp or directly on-chain using a block explorer. There is no "trust us" — the settlement data is on a public blockchain, verifiable by anyone.
If a settlement fails (e.g., the provider submitted an incorrect token count), you can dispute it through the community report system. A successful dispute results in a refund and a reputation penalty for the provider.
Contribution Guide: From User to Contributor
Coding Standards
ComputeFlux follows standard Go conventions (gofmt, go vet, effective Go) with two additional rules specific to the TEE environment:
1. No package-level mutable state. Package-level variables that are modified at runtime create non-determinism across enclave instances and make state synchronization between validators fragile. Use dependency injection (pass state through function parameters) or explicitly managed state stores (like store.IndexedList).
2. Error wrapping with context. Every error returned from a function should be wrapped with fmt.Errorf("context: %w", err) to preserve the error chain. This is standard Go practice, but it's especially important in a distributed system where errors propagate across node boundaries and the original context may be the only clue for debugging.
Finding Work
- Good First Issues: Tagged in the GitHub repository. These are small, well-scoped tasks that don't require deep protocol knowledge: adding a new field to an API response, improving a log message, writing a unit test for an uncovered code path.
- Protocol Integration: Adding support for a new AI provider's API (e.g., Cohere, Mistral, Groq) involves implementing the provider-specific protocol adapter in
pkg/api/gateway/protocol/and registering it in the routing table. - Performance Optimization: Profiling the scheduler's hot path, reducing allocations in the protocol translation layer, optimizing PebbleDB query patterns.
- Documentation: The docs site (
docs.computeflux.com) is open-source. Improving documentation is a high-impact contribution that doesn't require deep protocol expertise.
Community Channels
- GitHub Discussions: Long-form technical discussions, proposals, and RFCs.
- Discord: Real-time chat for development coordination, support, and community building. The
#devchannel is where maintainers and contributors coordinate;#providersis where provider operators share tips;#generalis for user questions and community discussion. - Twitter/X: Announcements, partnerships, and ecosystem updates.
- Governance Forum (upcoming): For DAO proposal discussion and temperature checks before formal on-chain voting.
The Community's Role in Protocol Evolution
ComputeFlux is open-source not as a marketing tactic, but as a security requirement. A TEE-based system where the code is not open-source cannot provide meaningful security guarantees: users must trust that the enclave runs the claimed code, but without source access, they cannot verify what the claimed code actually does. Open-source is the foundation of the trust model — the community is the auditor of last resort.
Every contribution to the codebase, whether a bug fix, a feature, or documentation, strengthens this trust model by increasing the number of eyes on the code and the diversity of perspectives scrutinizing its security. The network's decentralization is not just about validator count or token distribution — it's about the community of humans who understand, review, and improve the protocol. Joining ComputeFlux means joining that community.
Closing the Loop
This series opened, in Article 1, with a simple observation. If you run an AI gateway, your users' API keys sit in plaintext in someone's memory, your usage data can be silently rewritten, and your settlement numbers rest on trust in an operator you've never met.
Everything since has been the answer to that, built one layer at a time. DKG threshold signatures, so no single node ever holds a whole key. CometBFT consensus binding TEE attestation into every vote. A WASM contract runtime that upgrades itself without downtime. A scheduler and billing pipeline that turn trust into verifiable computation. A governance and audit system that keeps the network honest. The observability and deployment architecture that keeps all of it running.
None of it matters if it stays a design document. ComputeFlux is a network, not a whitepaper, and networks need people: developers who read the code and improve it, providers who bring compute and API keys into trust-minimized custody, and users who route their first request through it and start relying on cryptography instead of a promise.
Whichever one you are, the path in is the same one everyone before you took. Clone the repo, spin up the 3-node network, send your first request. Welcome to ComputeFlux.
Key Takeaways
- Three roles, three completely different first days. A developer's first day is reading a repo. A provider's is registering an identity and pointing a tunnel at it. A user's is changing two lines of configuration in code they already have.
- Open source is load-bearing, not promotional. A TEE's entire promise is "the enclave is running the code we claim." If nobody can read the claimed code, that sentence carries no information. The community is the auditor of last resort, and that's a structural fact rather than a value statement.
- The lowest-friction contribution isn't code. Documentation, a clearer error message, one test for an uncovered path — these need no protocol expertise and are where most people actually start.
- Providers come in two economically distinct flavors. Reselling API access earns the spread between your price and your upstream cost. Serving inference from your own GPU earns on the compute itself — closer to mining, except the work is useful.
- The trust boundary from Article 1 shows up as a directory boundary. Code inside the consensus path must be deterministic and enclave-safe; code outside it can do anything Go can do. That single line explains most of the repo's structure.
Thanks for reading
That's all 25 articles. If any part of this was useful, the most valuable thing you can do is pass it along — send someone the series index, or the one article that matched what they're working on. A trust-minimized network gets stronger with every additional person who has actually read how it works.
- Start over, properly: Series index and reading paths
- Lost on a term? Glossary
- Go back to the beginning: Article 1 — TEE Hardware Security & Attestation