Prerequisites
Create API Key
Confirm Provider Endpoint
Confirm Model Name Format
1. OpenAI SDK Setup
ComputeFlux provides an OpenAI-compatible /v1/chat/completions endpoint that works directly with the official OpenAI SDK.
from openai import OpenAI

client = OpenAI(
    base_url="https://test-api.computeflux.ai/v1",
    api_key="<your-computeflux-api-key>",
)

response = client.chat.completions.create(
    model="my-provider/gpt-4o",
    messages=[
        {"role": "system", "content": "You are a helpful assistant."},
        {"role": "user", "content": "Hello, ComputeFlux!"},
    ],
)

print(response.choices[0].message.content)
2. Popular AI Frameworks
2.1 LangChain
from langchain_openai import ChatOpenAI

llm = ChatOpenAI(
    base_url="https://test-api.computeflux.ai/v1",
    api_key="<your-computeflux-api-key>",
    model="my-provider/gpt-4o",
)

response = llm.invoke("Hello, ComputeFlux!")
print(response.content)
2.2 LlamaIndex
from llama_index.llms.openai import OpenAI

llm = OpenAI(
    api_base="https://test-api.computeflux.ai/v1",
    api_key="<your-computeflux-api-key>",
    model="my-provider/gpt-4o",
)

response = llm.complete("Hello, ComputeFlux!")
print(response.text)
2.3 Vercel AI SDK
import { openai } from "@ai-sdk/openai";
import { generateText } from "ai";

const result = await generateText({
  model: openai("my-provider/gpt-4o", {
    baseURL: "https://test-api.computeflux.ai/v1",
    apiKey: "<your-computeflux-api-key>",
  }),
  prompt: "Hello, ComputeFlux!",
});

console.log(result.text);
2.4 PydanticAI
from pydantic_ai import Agent

agent = Agent(
    "openai:my-provider/gpt-4o",
    base_url="https://test-api.computeflux.ai/v1",
    api_key="<your-computeflux-api-key>",
)

result = agent.run_sync("Hello, ComputeFlux!")
print(result.data)
2.5 Mastra
import { Mastra } from "@mastra/core";
import { openai } from "@ai-sdk/openai";

const mastra = new Mastra({
  agents: {
    computeflux: {
      instructions: "You are a helpful assistant.",
      model: openai("my-provider/gpt-4o", {
        baseURL: "https://test-api.computeflux.ai/v1",
        apiKey: "<your-computeflux-api-key>",
      }),
    },
  },
});

const agent = mastra.getAgent("computeflux");
const result = await agent.generate("Hello, ComputeFlux!");
console.log(result.text);
2.6 TanStack AI
import { useChat } from "@tanstack/react-ai";

function Chat() {
  const { messages, input, handleInputChange, handleSubmit } = useChat({
    api: "https://test-api.computeflux.ai/v1/chat/completions",
    headers: { Authorization: `Bearer <your-computeflux-api-key>` },
    body: { model: "my-provider/gpt-4o" },
  });

  return (
    <form onSubmit={handleSubmit}>
      <input value={input} onChange={handleInputChange} />
      {messages.map((m) => (
        <div key={m.id}>{m.content}</div>
      ))}
    </form>
  );
}
2.7 Effect AI SDK
import { OpenAiClient } from "@effect/ai-openai";
import { Config, Effect, Layer, ConfigProvider } from "effect";

const ConfigLive = Layer.setConfigProvider(
  ConfigProvider.fromMap(
    new Map([
      ["OPENAI_API_KEY", "<your-computeflux-api-key>"],
      ["OPENAI_BASE_URL", "https://test-api.computeflux.ai/v1"],
    ])
  )
);

const program = Effect.gen(function* () {
  const client = yield* OpenAiClient;
  const response = yield* client.chat.completions({
    model: "my-provider/gpt-4o",
    messages: [{ role: "user", content: "Hello, ComputeFlux!" }],
  });
  return response.choices[0].message.content;
}).pipe(Effect.provide(ConfigLive));

Effect.runPromise(program).then(console.log);
3. Editors & Coding Assistants
3.1 Cursor
Add Custom Model
Fill in Model Name
Override Base URL
Fill in API Key
Save and Use
3.2 VSCode Copilot / Codex
export OPENAI_BASE_URL="https://test-api.computeflux.ai/v1"
export OPENAI_API_KEY="<your-computeflux-api-key>"

codex --model "my-provider/gpt-4o"
Or write to ~/.codex/config.yaml:
model: my-provider/gpt-4o
provider: openai
baseURL: https://test-api.computeflux.ai/v1
apiKey: <your-computeflux-api-key>
3.3 Cline
Open Cline Extension Settings
Select Provider
Fill in Base URL
Fill in API Key
Fill in Model ID
3.4 Roo Code
Open Roo Code Settings
Select Provider
Fill in Base URL
Fill in API Key
Fill in Model
3.5 Kilo Code
Open Kilo Code Settings
Select Provider
Fill in Base URL
Fill in Model
3.6 Aider
aider --model openai/my-provider/gpt-4o \
      --openai-api-base https://test-api.computeflux.ai/v1 \
      --openai-api-key <your-computeflux-api-key>
3.7 Deep Agents CLI
export OPENAI_BASE_URL="https://test-api.computeflux.ai/v1"
export OPENAI_API_KEY="<your-computeflux-api-key>"

deep-agents --model "my-provider/gpt-4o"
3.8 JetBrains Junie CLI
Open Junie Settings
Select Provider
Custom Base URL
Fill in API Key
Fill in Model
3.9 Xcode
If your Xcode AI plugin supports custom OpenAI endpoints, fill in the Base URL, API Key, and Model.
4. Agent Configuration
4.1 OpenClaw
OpenClaw is a locally-run personal AI assistant that integrates with messaging platforms for remote control.
4.1.1 Install and Launch Configuration Wizard
curl -fsSL https://openclaw.bot/install.sh | bashAfter installation, the config wizard starts automatically. If not, run:
openclaw configureChoose Gateway Runtime Location
Select Configuration Section
Select Provider
4.1.2 Manual API Key Configuration
After selecting OpenAI Compatible in Model/auth provider, fill in the following:
Fill in API Base URL
Fill in API Key
Fill in Model
4.1.3 Verify
After configuration, run the following command to enter the TUI chat. A normal response means success.
openclaw tui4.2 Claude Code
Some ComputeFlux providers support the Claude (Anthropic) format. If your model backend has this enabled, point Claude Code to ComputeFlux via the following environment variables:
export ANTHROPIC_BASE_URL="https://test-api.computeflux.ai/anthropic"
export ANTHROPIC_API_KEY="<your-computeflux-api-key>"
export ANTHROPIC_MODEL="my-provider/gpt-4o"
claude
The actual model invoked is mapped by the backend based on the model name requested by Claude Code.
4.3 Hermes Agent
config.yaml:
llm:
  provider: openai
  base_url: https://test-api.computeflux.ai/v1
  api_key: <your-computeflux-api-key>
  model: my-provider/gpt-4o
5. Personal Compute Client Access
Download Client
Download the client for your operating system:
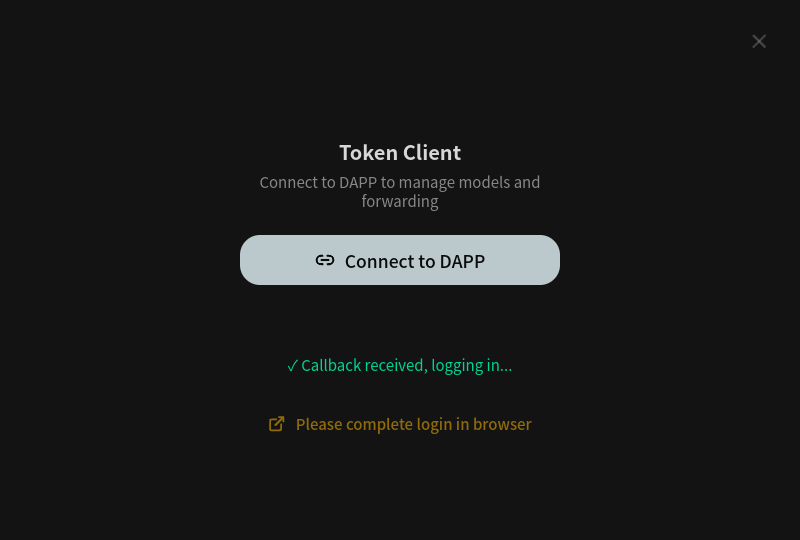
Log in to Client
After installation, open the client and log in with your wallet.
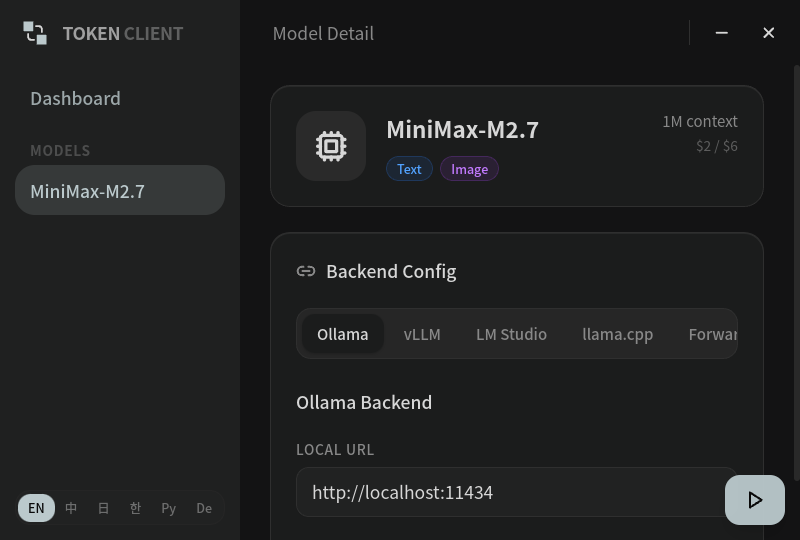
Enable Model Forwarding
Enable model forwarding in the client to start mining.
6. Personal Compute CLI Access
Download and Install CLI
Linux users can run the following command to download and install computeflux-cli:
sudo curl -fsSL \
  /client/computeflux-cli-0.0.1 \
  -o /usr/local/bin/computeflux-cli \
  && sudo chmod +x /usr/local/bin/computeflux-cli
Get API Key
Create and copy your Gateway API Key in the Dashboard:
Create models.json
Choose your model backend type, copy the config and save it as models.json:
{
  "apiKey": "<gateway-api-key>",
  "models": {
    "qwen2.5": {
      "ollama": {
        "url": "http://localhost:11434",
        "providerType": 0,
        "apiKey": ""
      }
    }
  }
}
Run computeflux-cli
Run the following command in the directory containing the config file:
computeflux-cli --config ./models.json5. Observability
7.1 Langfuse
from langfuse import Langfuse
      from langfuse.openai import openai

      langfuse = Langfuse(
          public_key="<langfuse-public-key>",
          secret_key="<langfuse-secret-key>",
          host="https://cloud.langfuse.com",
      )

      client = openai.OpenAI(
          base_url="https://test-api.computeflux.ai/v1",
          api_key="<your-computeflux-api-key>",
      )

      response = client.chat.completions.create(
          model="my-provider/gpt-4o",
          messages=[{"role": "user", "content": "Hello, ComputeFlux!"}],
      )